Research
I dove right into sourcing my images using Google patents, Unified patents, and GreyB to find the patents for the various objects in my life.
What became a bit of a puzzle was figuring out the names of patents for said objects because their current names often did not exist at the time of the filing.
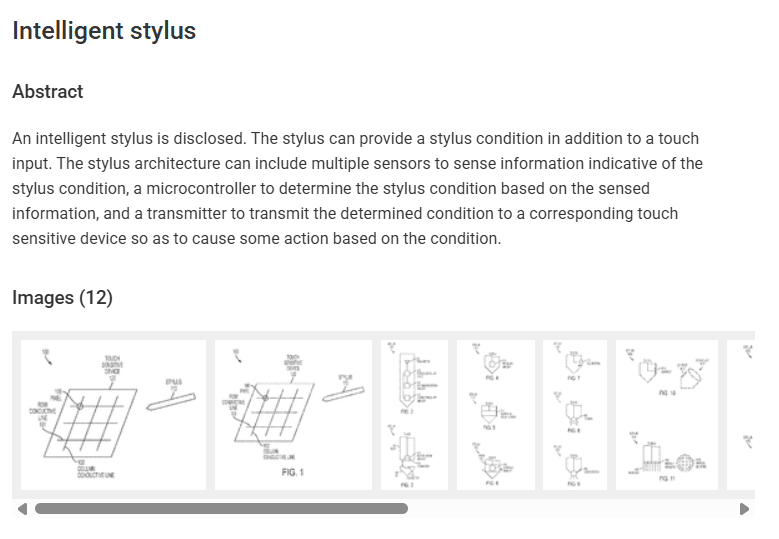
Instead, I often had to describe the technical name. Like an apple pencil was found under intelligent stylus or stylus of electronic device.
I dove right into sourcing my images using patents for the various objects in my life.
What became a bit of a puzzle was figuring out the names of patents for said objects because their current names often did not exist at the time of the filing.
Like an apple pencil was found under intelligent stylus or stylus of electronic device.
Context
After receiving the project prompt, I knew I wanted to create a book documenting the objects in my life. In another course, I was learning about IP and became fascinated by its complexities: the simultaneous openness and secrecy provided by patents.
From this I was inspired to "x-ray" the various products in my life to their first form, a sketch in a patent application.
Development Process
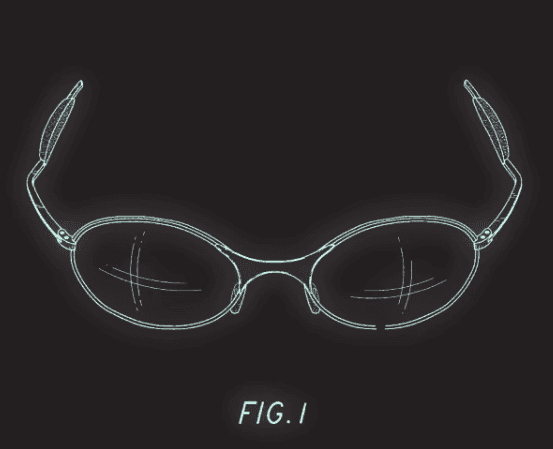
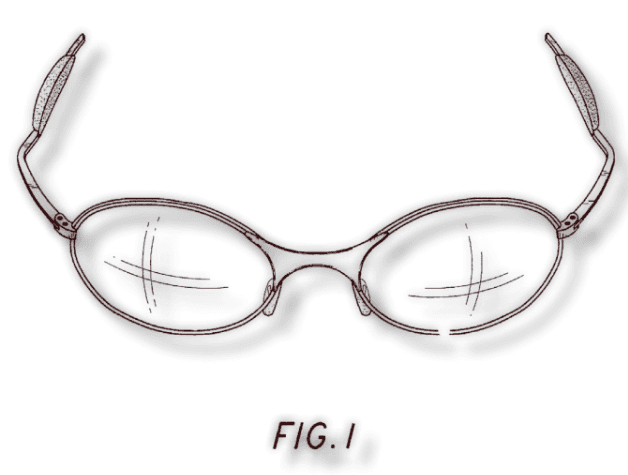
I brought the patent images into Photoshop where I removed the created the xray coloring using a gradient and clipping mask.
I then brought them into Adobe InDesign to create the book layout. After laying out the image I applied the glowing effect to create an X-ray look. I organized the book by transportation methods, —, and outdoors.
I used the Risograph to print white ink on black paper, but for the machine to read it, I reprocessed the images and created an inverted layout.
I then printed the book on the Risograph, and cut the pages to the dimensions of 4.375'' x 7''. Then, I perfect-bound the book.


Actual
Patent
Edited
Re-edited for print
Mine is a photobook taking X-rays of objects in my life using images sourced from patents.
The project prompt was to design and fabricate a book with a minimum of 50 pages that can be printed on demand.
My book was 100 pages.
Mine is a photobook taking X-rays of objects in my life using images sourced from patents.
The project prompt was to design and fabricate a book with a minimum of 50 pages that can be printed on demand.
My book was 100 pages.
Key Skills:
Adobe InDesign, Adobe Photoshop, Risograph Printing, Book Binding
Key Skills:
Adobe InDesign, Adobe Photoshop, Risograph Printing, Book Binding
Timeline:
6 weeks
Project Type:
Individual Class Project
Results
Learnings + Future Work
I would work try to overlay colors onto the white ink to create more depth. I'd even potentially test how other colors appear on the black to create different background effects.
Do more research on fabrication methods to prevent extra time spent on converting your file to the needed format and layout.
When processing a large number of files keep files organized, labeled, and use Photoshop Automate to speed up the process.
Make sure cut markers are highly visible to make the binding process easier and to achieve better alignment.


Full PDF Edited
Full PDF for Riso


The white ink on black paper created a unique effect enjoyed by myself and outside audiences. I only wish that there was more of a glowy effect within the book to better articulate the xray look.
Now that I am more comfortable with Riso, I would think about color theory to bring the depth into the design. I would consider printing the original version with the blacked out background, though I feel it's a waste of ink.
Project Type:
Individual Class Project
Timeline:
6 weeks
Key Skills:
Adobe InDesign, Adobe Photoshop, Risograph Printing, Book Binding
MINE
MINE
The white ink on black paper created a unique effect enjoyed by myself and outside audiences. I only wish that there was more of a glowy effect within the book to better articulate the xray look.
Now that I am more comfortable with Riso, I would think about color theory to bring the depth into the design. I would consider printing the original version with the blacked out background, though I feel it's a waste of ink.
Context
I wanted to create a book documenting the objects in my life. In another course, I was learning about IP and became fascinated by its complexities: the simultaneous openness and secrecy provided by patents.
From this, I was inspired to "x-ray" the various products in my life to their first form, a sketch in a patent application.
MINE
Learnings + Future Work
I would work try to overlay colors onto the white ink to create more depth. I'd even potentially test how other colors appear on the black to create different background effects.
Do more research on fabrication methods to prevent extra time spent on converting your file to the needed format and layout.
When processing a large number of files keep files organized, labeled, and use Photoshop Automate to speed up the process.
Make sure cut markers are highly visible to make the binding process easier and to achieve better alignment.
Key Skills:
Adobe InDesign, Adobe Photoshop, Risograph Printing, Book Binding
Timeline:
6 weeks
Project Type:
Individual Class Project
Mine is a 100 page photobook taking X-rays of objects in my life using images sourced from patents.
The project prompt was to design and fabricate a book with a minimum of 50 pages that can be printed on demand.
Results
Learnings + Future Work
Do more research on fabrication methods to prevent extra time spent on converting your file to the needed format and layout.
When processing a large number of files keep files organized, labeled, and use Photoshop Automate to speed up the process.
I would work try to overlay colors onto the white ink to create more depth. I'd even potentially test how other colors appear on the black to create different background effects.
Make sure cut markers are highly visible to make the binding process easier and to achieve better alignment.
Development Process
I brought the patent images into Photoshop where I removed the created the xray coloring using a gradient and clipping mask.
I then brought them into Adobe InDesign to create the book layout. After laying out the image I applied the glowing effect to create an X-ray look. I organized the book by transportation methods, —, and outdoors.
I used the Risograph to print white ink on black paper, but for the machine to read it, I reprocessed the images and created an inverted layout.
I then printed the book on the Risograph, and cut the pages to the dimensions of 4.375'' x 7''. Then, I perfect-bound the book.
Actual
Patent
Edited
Re-edited for print
Development Process
I brought the patent images into Photoshop where I removed the created the xray coloring using a gradient and clipping mask.
I then brought them into Adobe InDesign to create the book layout. After laying out the image I applied the glowing effect to create an X-ray look. I organized the book by transportation methods, —, and outdoors.
I used the Risograph to print white ink on black paper, but for the machine to read it, I reprocessed the images and created an inverted layout.
I then printed the book on the Risograph, and cut the pages to the dimensions of 4.375'' x 7''. Then, I perfect-bound the book.
Actual
Actual
Patent
Edited
Re-edited for print
The white ink on black paper created a unique effect enjoyed by myself and outside audiences. I only wish that there was more of a glowy effect within the book to better articulate the xray look.
Now that I am more comfortable with Riso, I would think about color theory to bring the depth into the design. I would consider printing the original version with the blacked out background, though I feel it's a waste of ink.